How to Share Videos the Right Way: A Complete Guide
Published : Aug 5, 2025
Written by: Madeson Sykes
22 minutes read
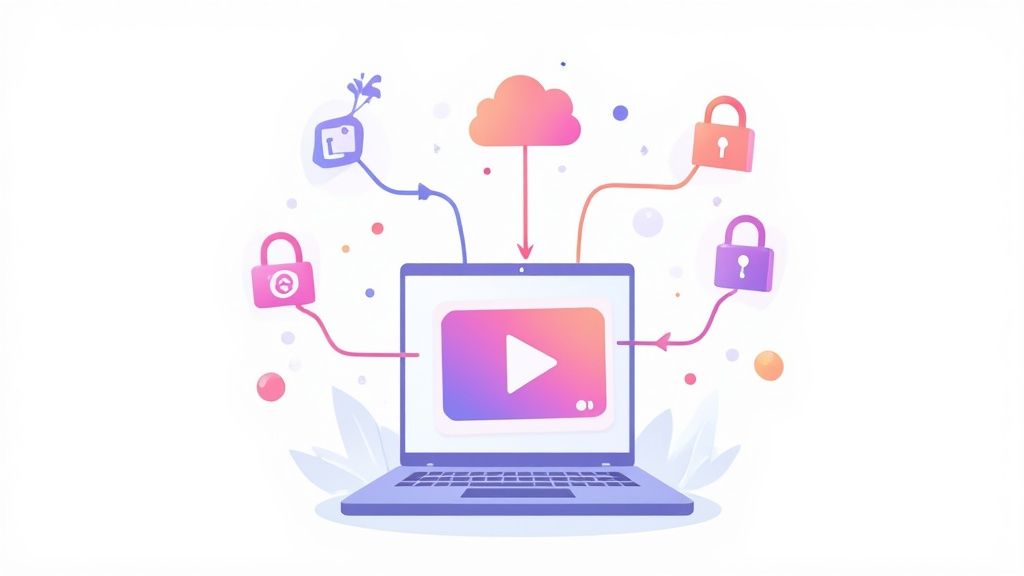
How you share a video is just as important as the video itself. To get it right, you need to match your method to your goal. For instance, if you want your video to go viral, social media is your best bet. If you’re sending a high-quality cut to a client, a secure direct link is the professional choice. And for boosting engagement on your own turf, you’ll want to embed the video right on your website.
Picking the right path from the start makes all the difference. It ensures your audience sees your work exactly as you intended.
Understanding Your Video Sharing Options
Before you upload anything, let’s walk through the main ways to share a video. The best method really boils down to what you’re trying to accomplish. Are you chasing millions of views? Sending a confidential rough cut to a handful of stakeholders? Or maybe you’re adding a product demo to your landing page. Each of these situations calls for a different tool.
Generally, your choices fall into one of three buckets: posting on a social platform, sending a direct link via a file-sharing service, or embedding it on a webpage. This isn’t just a technical detail—it affects everything from video quality and compression to the security of your content.
Choosing The Right Method
Take a moment to think about your audience and your objective. It’ll save you a lot of headaches later. For example, sending a beautiful, massive 4K video file through a service that crushes it with compression will completely undermine its quality. That’s a bad look for a client presentation. On the flip side, uploading that same private client draft to a public platform like YouTube, even as an “unlisted” video, opens you up to unnecessary risks.
The trick is to align the tool with the job at hand. This decision tree is a great way to visualize which path to take based on your file size and who needs to see it.
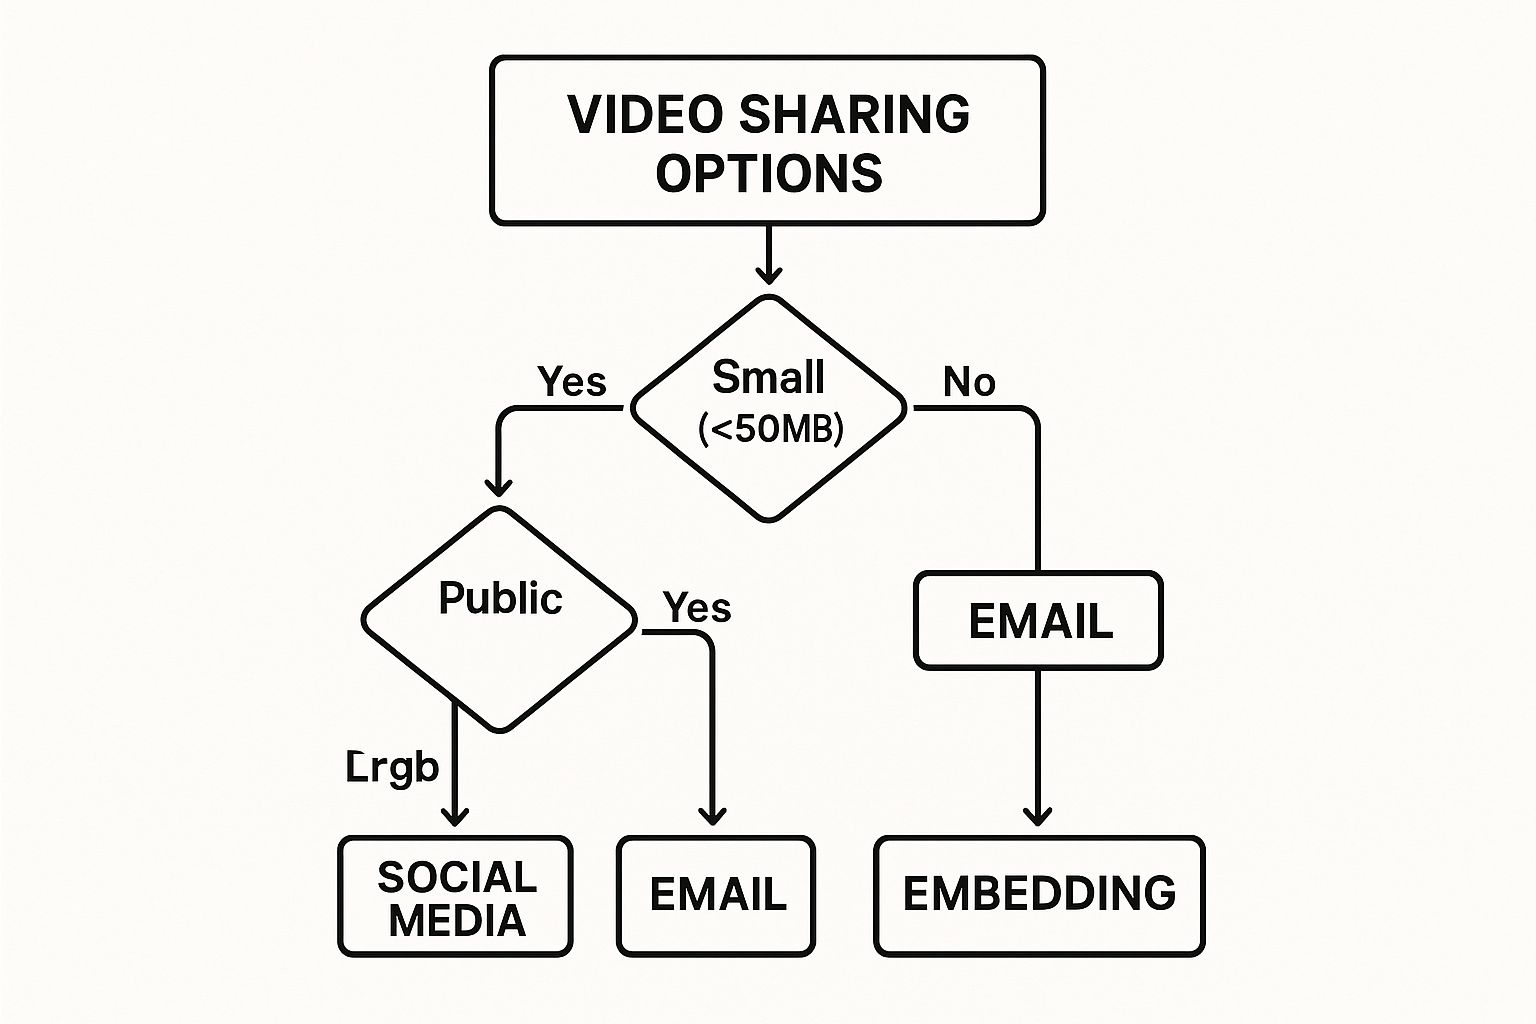
As the graphic shows, your choice is often a trade-off. You’re balancing public visibility against private control, and small files are always simpler to manage than large ones.
To make this even clearer, here’s a quick cheat sheet.
Which Video Sharing Method Is Right for You
This table breaks down the most common sharing methods so you can quickly find the best fit for your situation.
| Method | Best For | Key Advantage | Main Limitation |
|---|---|---|---|
| Direct Link (Href.sh) | Securely sharing large, high-quality files with specific people (clients, collaborators). | Total control: password protection, download limits, and no quality loss. | Not designed for broad, public discovery. |
| Social Media | Reaching a wide audience, building community, and going viral. | Massive built-in audience and powerful sharing features. | Aggressive compression; you lose control over the content. |
| Video Embed | Website engagement, tutorials, and product demos. | Keeps visitors on your site and improves user experience. | Can slow down your site if not optimized; requires a hosting service. |
| Email Attachment | Quick, informal sharing of very small, low-res video clips. | Simple and direct for one-on-one communication. | Severe file size limits (usually under 25 MB); not secure. |
Ultimately, the right tool depends entirely on the task. A direct link is perfect for professional review, while social media is your stage for public performance.
The Impact Of Video’s Growth
Getting this right matters more every day because video isn’t just a part of the internet anymore—it is the internet. Experts project that by 2025, video will account for a mind-boggling 82% of all internet traffic worldwide. You can find more fascinating video marketing statistics over at Teleprompter.com.
This shift means that knowing how to share videos properly is no longer just a technical skill—it’s a core communication competency. Whether you’re a marketer, a creator, or just sharing memories, the right method ensures your message lands with impact.
It’s a lot like learning the basics before you figure out how to publish a website. Building on a solid foundation helps you avoid common mistakes down the road. Each sharing method we’ll cover has unique strengths and weaknesses, and understanding them is the key to making the right call every time.
Getting Your Video Ready for Social Media Success
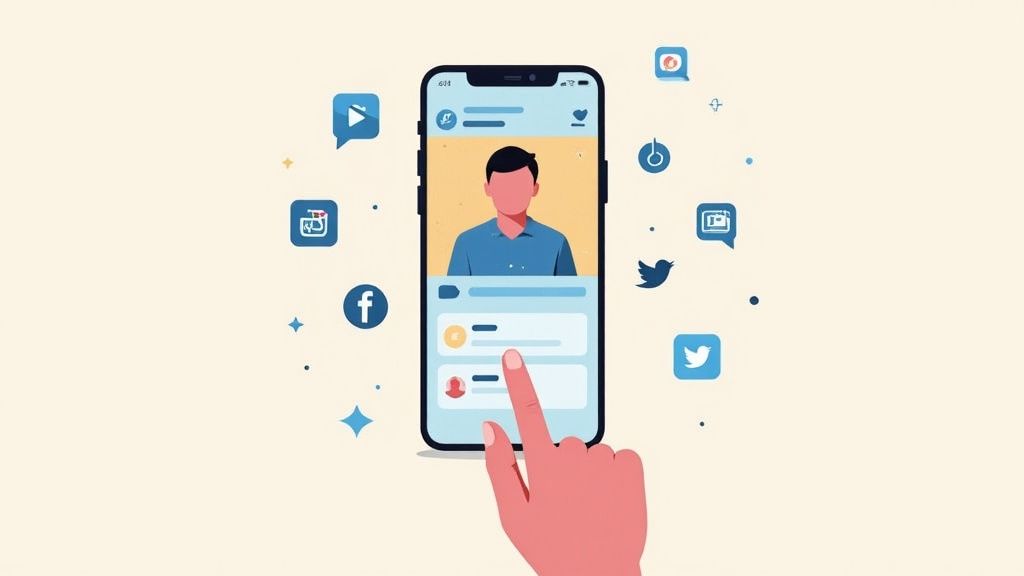
Throwing a video onto social media is easy. Getting people to actually watch it? That’s a different story. To get real traction, you have to think like the platform and play by its rules. It’s less about just uploading and more about adapting to each unique environment.
Frankly, generic advice won’t cut it here. The single most important thing you can do is match your video’s format and style to the platform where it will live. Getting this right can be the difference between a viral hit and a total flop.
Format for the Feed
Every social platform has its preferred video shape, and ignoring it is a surefire way to get ignored yourself. A video that’s stunning on one feed can look chopped up and awkward on another.
Here’s the breakdown:
- Vertical (9:16): This is the undisputed champion for platforms like Instagram Reels, TikTok, and YouTube Shorts. It’s designed to fill the entire phone screen, creating a full-screen, immersive experience for scrollers.
- Landscape (16:9): The classic widescreen format is still the go-to for YouTube and Vimeo. It’s perfect for detailed, longer content—think tutorials, cinematic shorts, or in-depth reviews where you need that extra horizontal real estate.
- Square (1:1): This is a fantastic, versatile option for in-feed posts on Instagram and Facebook. It commands a lot of screen space without forcing someone to turn their phone sideways.
Practical Example: Imagine a marketing agency sharing a new case study. They’d likely produce a polished 16:9 video for a deep dive on YouTube. Then, they’d chop up the best moments into a fast-paced 9:16 Reel for Instagram to grab attention quickly. Same content, different package.
Think of it this way: You wouldn’t show up to a black-tie gala in hiking boots. Forcing a landscape video into a vertical-first platform just looks out of place and tells everyone you don’t really get the platform’s culture.
To Upload Natively or Just Post a Link?
This is a crossroads every creator faces: upload your video file directly to the platform (native) or just share a link from another site like YouTube? I’ll make it simple for you—social media algorithms almost always favor native content.
Why? Platforms are designed to keep users engaged on their site. When you upload a video natively, you’re giving them content that does just that. They reward you with better reach and a higher chance of showing up in people’s feeds. Post an external link, and you’re trying to send traffic away. The algorithm sees this and will often suppress your post’s reach.
Practical Example: You made an amazing product demo video.
- Bad: You upload it to YouTube, then copy the YouTube link and paste it into a new post on Facebook. Facebook will likely show this to fewer people.
- Good: You upload the video file directly to YouTube. Then, you take the same video file and upload it directly to Facebook. Both platforms get the native content they prefer, maximizing your reach on each.
Take YouTube, for example. It’s the second-largest search engine in the world and is projected to hit 2.85 billion users by 2025. While its power is undeniable, pasting a YouTube link on Facebook will almost certainly get less engagement than if you uploaded that exact same video file directly to Facebook. If you’re curious, you can find more incredible stats on YouTube’s massive user base over at Global Media Insight.
Aligning Your Content with Platform Culture
Beyond the technical stuff, you need to think about the vibe. The content that crushes it on one network can fall completely flat on another simply because the audience expectations are wildly different.
Let’s look at a real-world scenario.
Scenario: A New Tech Startup Launching an App
- YouTube: They create a detailed 15-minute tutorial in a 16:9 format, walking users through every feature of their new software. The tone is educational and thorough.
- Instagram Stories: They share quick, behind-the-scenes clips of the team celebrating the launch. It’s casual, personal, and disappears in 24 hours.
- TikTok: They produce a fun, snappy 30-second video showing off one cool, hidden feature, all set to a trending sound. The goal here is pure entertainment and discovery.
By tailoring not just the format but the content itself, the startup connects with entirely different audiences in the way each one prefers. This is how you maximize your odds of success across the board.
Using Direct Links and Embedding Strategically
Sometimes the most effective way to share a video isn’t on a crowded social platform. A simple, direct link or a strategically placed embedded player can offer far more control and create a better experience for your audience. But knowing when to use which is key—it’s a choice that directly impacts how people interact with your content.
A Step-by-Step Guide to Sharing via Direct Link
Think of a direct link as your private viewing room. It’s the perfect solution when you need confidentiality and control. Here’s how you would use it for a professional project.
- Choose a Sharing Service: Sign up for a secure file-sharing service like Href.sh that is designed for large files.
- Upload Your Video: Drag and drop your final, high-resolution video file into the uploader.
- Add Security: Before sharing, add a password to the file. This ensures only the intended recipient can view it.
- Share the Link: Copy the generated link and send it directly to your client via email. Include the password in a separate message for added security.
This method also maintains the video’s original, uncompressed quality, which is non-negotiable for professional reviews. It’s a clean, direct line of communication that says, “I made this specifically for you.”
Embedding to Keep Your Audience on Your Turf
Embedding is a completely different game. It’s all about bringing the video directly into your environment, whether that’s your website, portfolio, or blog. Instead of shipping your audience off to another site, you keep them right where you want them.
A Step-by-Step Guide to Embedding a Video:
- Upload to a Host: First, upload your video to a hosting platform like YouTube, Vimeo, or a dedicated service.
- Get the Embed Code: Find the “Share” button on your video’s page, and then look for an “Embed” option. This will give you a snippet of HTML code.
- Copy the Code: Select and copy the entire HTML embed code.
- Paste it on Your Site: Open your website’s editor, switch to the HTML or code view of your page, and paste the code where you want the video to appear.
- Publish: Save your changes and publish the page. The video player will now be live on your site.
The bottom line is this: a direct link sends your traffic away, while an embed keeps them on your site. For any video you want to feature on your own domain, embedding is almost always the right call.
Customizing the Playback Experience
Here’s where embedding gets really powerful: customization. When you get an embed code from a video host, it’s just a snippet of HTML. You don’t have to just copy and paste it as-is. You can tweak it to control exactly how your video looks and behaves.
You can often adjust settings like:
- Autoplay: The video starts the moment the page loads. Be careful with this one—it can be annoying—but it’s fantastic for dedicated landing pages where the video is the main event.
- Loop: Make the video repeat endlessly. This works wonders for short, atmospheric background videos on a homepage.
- Hide Controls: Get rid of the play/pause button and timeline for a super clean look. It’s perfect for making a video feel like a seamless, integrated part of your site’s design.
Practical Example: A web designer could embed a silent, looping video montage of their best work on their homepage. By hiding the controls, it stops feeling like a clunky video player and becomes an elegant, moving part of the design itself. This is how you turn a simple video file into a core part of your website’s story.
How to Share Large Video Files Without Sacrificing Quality
Trying to email a large video file is almost always a dead end. Most email providers throw up a wall at a measly 25 MB, which is barely enough for a few seconds of high-resolution footage. And let’s not even talk about social media—their compression algorithms are notorious for turning beautiful, crisp 4K video into a pixelated soup.
So, what’s the solution when you need to send a massive video file and keep every pixel intact? You have to turn to a dedicated file transfer service. These platforms were built from the ground up to handle big files, ensuring what you send is exactly what your recipient sees.
Moving Beyond Email and Social Media
When you’ve poured hours into a high-quality video, the last thing you want is for the delivery method to ruin it. Imagine a videographer sending the final cut of a wedding film or a marketing team circulating a new ad for review. In these high-stakes scenarios, any loss in quality is simply not an option.
This is precisely where a service like Href.sh comes into play. Instead of trying to attach an oversized file, you upload the video—no matter the size—and get a simple link to share. The person on the other end just clicks it to view or download the video in its original, uncompressed form. It’s that straightforward.
For any professional, this is a non-negotiable part of the workflow. Delivering a video that retains 100% of its original quality isn’t just about the file; it’s a reflection of your professionalism and respect for the work. It makes sure the first impression is the right one.
A Practical Walkthrough: Sharing a Large Video with a Client
Let’s imagine a real-world situation. You’re a creative agency, and the client needs to sign off on a 5 GB 4K video. Email is out, and you certainly can’t post it publicly for the world to see. Here’s the professional way to handle it step-by-step with a file transfer service:
- Upload Your Video: Drag and drop the large video file directly into the uploader. The platform takes care of the heavy lifting, often using a method called “chunking” to break the file into smaller pieces for a faster, more reliable upload.
- Generate a Secure Link: As soon as the upload finishes, you’ll get a unique, secure link. This is your key to sharing the file.
- Set Your Access Controls: Before sending, apply security settings. Add a password to the link so only your client can open it. For added control, set the link to expire in 72 hours to create a sense of urgency and prevent outdated versions from circulating weeks later.
- Share Professionally: Email the link to your client, explaining that the high-quality video is ready for their review.
This approach gives you total command over your work. The same principles of secure, controlled access can be applied to other digital projects, a topic we touch on in our guide to free static website hosting.
Why a CDN Is a Game-Changer for Sharing Video
One of the most powerful, yet often overlooked, features of a top-tier file-sharing service is its use of a Content Delivery Network (CDN). A CDN is a global network of servers that stores copies of your file in various locations around the world.
When someone in Tokyo clicks your link, the video streams from a server in Asia, not from one in New York. The result? Dramatically faster downloads and buffer-free streaming for everyone, no matter their location.
For any business working with international clients or a remote team, a CDN is the secret sauce. It eliminates the frustration of slow-loading files and ensures a smooth, professional experience for every single viewer.
Optimizing Your Video Before You Share It
A brilliant sharing strategy won’t save a poorly prepared video. Before you even think about distribution, you need to run a quick pre-flight check on your content. Skipping this prep work is like building a house on a shaky foundation—it’s just asking for trouble later on.
The first thing I always tackle is compression. Raw video files straight from a camera are massive. We’re talking gigabytes. They’re a nightmare to upload and a real pain for anyone trying to stream them. The goal is to shrink that file size way down without anyone noticing a drop in visual quality.
A Step-by-Step Guide to Compressing a Video:
- Download a Tool: Get a free, reliable compression tool like HandBrake.
- Open Your File: Launch the program and open your large, raw video file.
- Choose a Preset: To keep things simple, select a preset designed for the web, like “Fast 1080p30.” This automatically applies good settings for quality and file size.
- Start Encoding: Choose where you want to save the new, smaller file and click the “Start Encode” button.
- Check the Result: A hefty 2 GB video can easily be crunched down to around 200 MB, making it far more manageable.
Choose a Universal Format
Once your video is a reasonable size, you have to think about playback. You might have edited your project in a professional format like .MOV or .AVI, but these aren’t always friends with every device or browser.
The undisputed champion for compatibility is MP4. It’s the gold standard for a reason: it just works. MP4 plays perfectly on virtually anything—smartphones, tablets, laptops, and smart TVs. Simply exporting your final cut as an MP4 is a simple move that prevents a world of playback headaches for your viewers.
Think of MP4 as the universal language for video. When you use it, you’re basically guaranteeing that anyone who gets your link or lands on your page can watch your content instantly, no special software or plugins required.
This is more important than ever. With a staggering 89% of businesses now using video in their marketing, the viewer’s experience is everything. And since 79% of consumers prefer watching on their phones, a mobile-friendly format isn’t just nice to have—it’s essential. You can dig deeper into how viewing habits are shifting with these social media video statistics from Sprout Social.
Create a Thumbnail That Demands a Click
Your video’s thumbnail is its billboard. Whether it’s on a YouTube feed or in an email preview, it’s the very first thing people see. It’s the single biggest factor in whether they click play or keep scrolling. Never let a platform pick a random, blurry frame for you; that’s just a wasted opportunity.
Instead, you need to design a custom thumbnail that gets the job done. A great thumbnail is:
- Bright and Clear: Use high-contrast colors and a sharp, high-resolution image.
- Intriguing: Show an exciting moment from the video or a clear shot of a person’s face to build an immediate connection.
- Informative: A few words of text can tell viewers exactly what they’re about to see.
Practical Example: A thumbnail for a “How to Bake Sourdough” video could show a gorgeous, perfectly golden loaf of bread with “Easy Sourdough Recipe” overlaid in a clean, bold font. That’s infinitely more compelling than a random shot of someone mixing flour in a bowl.
Nail the Basics of Video SEO
Finally, if your video is destined for a public platform like YouTube, you need to help people find it. This comes down to some basic video SEO (Search Engine Optimization). It’s not nearly as complicated as it sounds and really just boils down to a few key things:
- A Descriptive Title: Your title needs to say exactly what the video is about and include words people might actually search for. “My Trip” is useless. “4K Drone Footage of the Amalfi Coast” is a great title.
- A Detailed Description: Don’t skimp here. Write a paragraph or two that explains the video’s content. This is the perfect place to add more keywords, links to resources you mentioned, and even timestamps for longer videos.
- Relevant Tags: Add a healthy mix of broad and specific tags related to your topic. For that Amalfi Coast video, you’d want to use tags like “Italy,” “travel vlog,” “drone footage,” “Amalfi Coast,” and “4K video.”
Taking care of these steps ensures your video isn’t just high-quality and easy to watch, but also discoverable by the very people you want to reach.
Common Questions About Sharing Videos
Even with the best tools in your back pocket, you’re bound to run into a few practical questions when it’s time to actually hit “send” on a video. Getting these things sorted out helps you share your work confidently, whether it’s a critical client project or just a personal memory.
Let’s walk through some of the most common hurdles I see people face.
What Is the Best Way to Send a Long Video Privately?
When you’re dealing with long videos, especially ones you want to keep private, your best bet is a dedicated file-sharing service like Href.sh. This completely sidesteps the frustratingly small file size limits you run into with email. More importantly, it preserves the original quality of your video—something social media platforms just can’t do.
Practical Example: A videographer needing to send a final, high-resolution wedding film to a client can upload the massive file and share a single, secure link without a single pixel of quality loss.
The real advantage here is having total control. A good service lets you add extra security layers. For instance, you can learn how to protect a video with a password, which is the perfect way to make sure only your client can open and view the file.
Does Sharing a Video on Social Media Reduce Its Quality?
Yes, it absolutely does. Every major social media platform compresses videos, and they compress them a lot. It’s not personal—they do it to save on their own server space and to make sure videos load quickly for everyone, even people on slower connections.
The trade-off is a significant drop in your video’s resolution and bitrate, which means the visuals just won’t look as sharp or detailed. This is totally fine for quick, casual clips, but it’s a deal-breaker for any high-quality or professional work. If you need to show off a video in its full, original glory, host it somewhere that supports high-quality playback and share it with a direct link.
What Is the Difference Between Embedding a Video and Linking to It?
This is a really important distinction.
- Linking to a video means you give someone a URL. When they click it, they’re whisked away from your website to another platform, like YouTube, to watch it.
- Embedding a video, on the other hand, places the video player directly onto your own webpage or blog post.
Practical Example: A blogger writing a product review would embed the video review directly in the article to keep readers on their site. If they just linked to it, the reader would leave the blog post to go to YouTube, and they might never come back.
Embedding is almost always the better experience for your audience. It keeps them on your site, engaged with your content, and can dramatically increase how long they stick around.
How Can I Share a Video with Someone Who Is Not Tech-Savvy?
When you’re sharing with someone less comfortable with technology, the key is to keep it as simple as possible. The most straightforward method is using YouTube’s “Unlisted” feature.
A Step-by-Step Guide for Sharing with Non-Tech-Savvy Users:
- Upload to YouTube: Go to YouTube and upload your video.
- Set Privacy to “Unlisted”: During the upload process, in the “Visibility” step, choose the “Unlisted” option. This means only people with the direct link can see it.
- Copy the Link: Once the video is processed, YouTube will provide a shareable link. Copy it.
- Send the Link: Paste the link into an email or message and send it. All they have to do is click it, and the video will open in a familiar player without any extra steps.
Ready to share your videos securely and without quality loss? Href.sh gives you total control over your files with password protection, link expiration, and a global CDN for lightning-fast delivery. Start sharing smarter with Href.sh.